|
Air pressure and water are the fuel for this high flying rocket. Blasts off with a watery whoosh and reaches altitudes
of 30-40 feet. Can easily be built and flown in less than an hour.
|
|
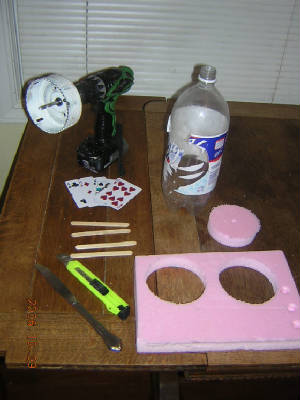
Tools:
- Drill
- 4" hole saw
- drill bit (a little smaller than a needle valve)
- Razor knife
- Butter knife
- Hot glue gun (reccomended)
Materials:
- 2 liter bottle
- Stopper (or cork) to fit the bottle
- Tire pump (just about any variety)
- Needle valve (as used to inflate basketballs, soccer balls, etc)
- 1" extruded polystyrene insulation (pink or blue), available at most home centers as 2' x8' sheet ($10) - you can also use 1.5" or 2" white foam board insulation.
- 4 popsicle sticks
- 4 playing cards (or 2 cut in half diagonally)
- Masking tape
Procedure:
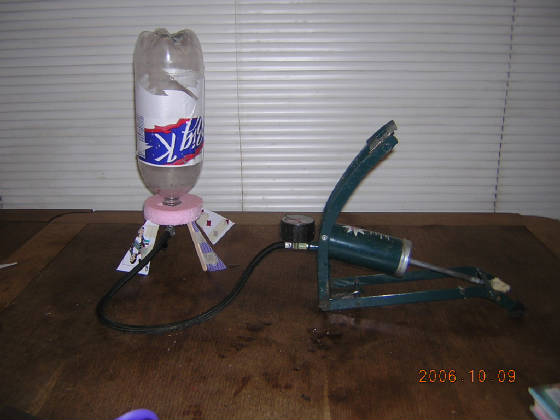
Launcher
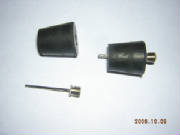
- Drill a hole through the stopper and insert a needle valve.
- Attach the needle valve to the tire pump.
Rocket
- Using a drill and 4" hole saw, from the polystyrene sheet, cut out a 4" circular disc for the base
for the rocket.
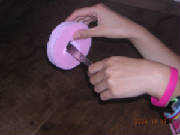
- Ream out the center of the base with the butterknife so it fits on the bottle.
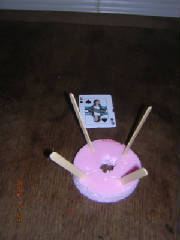
- Using a razor knife, cut four slits in the base and insert the popsicle sticks, angled slightly outwards.
- Tape playing cards to the popsicle sticks and trim them to any shape you like. An adult can reinforce the connection
with a few drops of hot glue.
- Insert the bottle into the base. Some hot glue and or tape can be used if it is loose.
Launch Instructions
- Pour a cup or so of water into the bottle.
- Insert the launch stopper into the bottle.
- Place the rocket upright on the ground.
- Ensure noone stands over the rocket.
- Pump air into the rocket with the pump - BLAST OFF!
|
|
|
|
|
|
The Science:
Air can be pressurized (squished) in the bottle to create potential energy. When enough
pressure is achieved to overcome the friction of the stopper, the water is forced out the nozzle
of the rocket in an explosive manner. As Newton said, every action has an equal and opposite reaction, in
this case causing the rocket to shoot skyward.
| Click the pictures to supersize them. |
|
| Gather supplies |
|
| Drill out stopper and insert needle valve for the launch stopper |
|
| Ream out hole in base with butterknife till it fits tightly over neck of bottle |
|
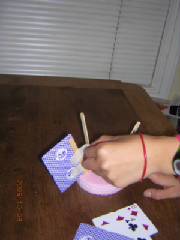
| Cut four slits into base and insert popsicle sticks |
|
| Tape playing cards to sticks and trim to a pleasing shape. |
|
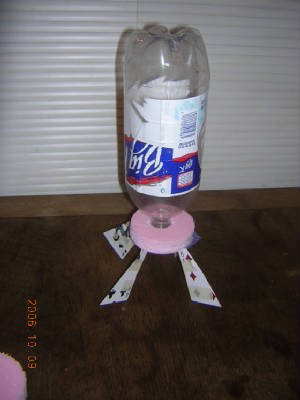
| Insert bottle into hole in base |
|
| Fill bottle with a cup or so of water, insert the launch stopper and you're ready to launch! |
|
|
|
|
|
|
Tips
- Bend the fins for an awesome spinning rocket.
- for a slightly simpler design, substitute toungue depressers or Jumbo Craft Sticks for the popsicle sticks and skip the playing cards.
- Cut a few extra bases, they can split or get reamed out too far.
- Don't cut too deeply into the base for the popsicle sticks. If the base splits you can wrap
tape around the perimeter or try hot glue.
- For a group launch, have four or five pump launchers and a couple five gallon buckets of water
with cups in them.
- Bring extra tape to the launch and when a rocket breaks on landing, shout "FIELD REPAIR".
- You can use foot pumps, bike pumps without hoses, or t-handle pumps.
T-handle pumps with short hoses have greatest potential of the person pumping getting
his/her face in the path of a rocket.
- Other water rocket ideas here and here.
|
|
|